Let’s Brew!
In the last edition of SPP, we talked about the key ingredients in beer: water, barley, hops and yeast! Now, these are by no means the only ingredients that make up beer, but in its most basic form, those are all it takes. Ready to dig in and get dirty? Hang on! There’s one really important thing to know before we do that: A brewer needs to understand that their first job is to be an excellent cleaner. You see, a brewer is essentially a glorified janitor. You are constantly sanitizing and scrubbing and cleaning so that those yeast cells are happy. After all, would you want to feast in a dining room full of harmful bacteria and mold? Or worse yet, have some wild yeast trying to steal your dinner?! I would think not. Remember, cleanliness is next to beerliness!
Ok now that that’s settled, let’s look at the process.
The mash: This is the first main step in the process. Barley and other grains that are used in the recipe are soaked in hot water (generally between 150 and 160 degrees). This process goes on for about an hour and ensures that all of the necessary sugars are being released from the barley. This is done in a piece of equipment called a mash tun. Mine is made out of a Gatorade water cooler as most home brewers are.
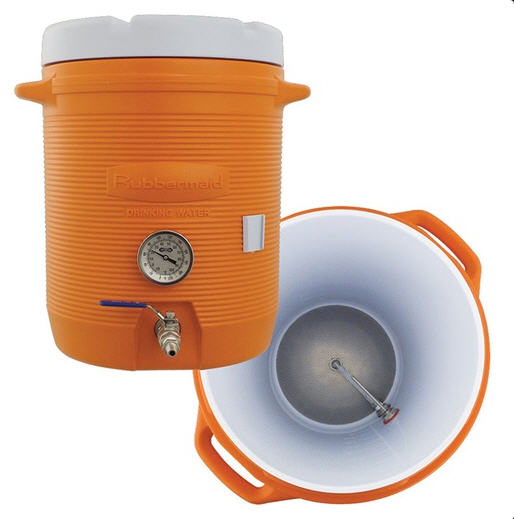
The sparge: Sparging is basically a fancy word for rinsing. Most brewers will use a combination mash/lauter tun (abbreviated MLT). This is a mash tun that includes a false bottom. This is essentially a colander that is placed between the draining valve and the grain. Hot water is rinsed over the top of the grain as it is slowly drained into the brew kettle. The hot water ensures that all of the sugars are rinsed off of the grain. You’ll never get all of it, so most brewers shoot for 75% efficiency and will fine tune their recipes accordingly. As you can tell, sugar is extremely important!
The boil: this is my favorite part. The beer is brought to a boil for at least an hour (recipe dependent) and all of the other ingredients including hops, spices, herbs, fruit and anything else you can throw at it, are added to the beer. You now have a very sweet very hot, non-alcoholic version of beer called wort.
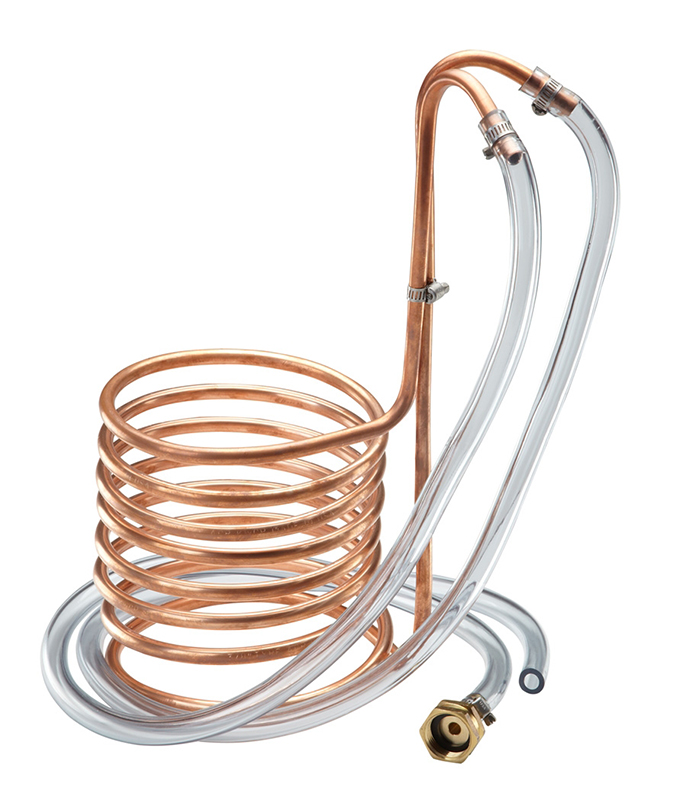
Final steps: The wort is chilled using a….yup you guessed it, wort chiller. There are various types of wort chillers or other contraptions like heat exchangers that you can chill wort with. There’s always that incredibly complex thing called snow (really great for chilling beer quickly in the winter). My chiller is made from coiled up copper tubing that you’d find in the HVAC/refrigeration aisle at your local hardware store. Cool hose water goes in one way and hot hose water comes out the other. Once the beer is chilled to about 75 degrees (room temperature) the beer is transferred through a strainer into a large glass carboy, or food safe plastic fermenting bucket. The yeast is then pitched (added).
Give the beer a good shake, as yeast like lots of oxygen, wait a couple of weeks, bottle, and enjoy!
Oh and I almost forgot! The most important rule of them all: Always be sure to enjoy a homebrew (or your favorite beer) as you brew. Just don’t forget to clean up!
Cheers!
Shark Puppet Pub is written by Chris Zaccaria. You can start a drunken argument over his taste in beer on Twitter.